
Event Ticket Wizard
On the Tickets tab of an Event record, you can add activities that become a component of the ticket and determine what information to collect during the registration process. This information allows you to communicate event updates to those who register and track their attendance on the Event record.
To create tickets, select the Tickets tab, click Let’s Do It when prompted to use the wizard for creating a ticket, and then follow these steps:
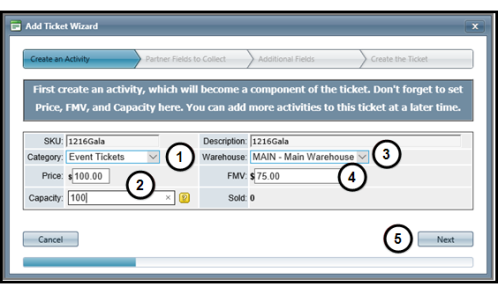
- Select Event Tickets.
- Enter a ticket price and establish the maximum number of these tickets available to sell.
- Select the Warehouse responsible for shipping the tickets.
- Enter the FMV (Fair Market Value) for the ticket that can be claimed as a tax deduction.
- Click Next.
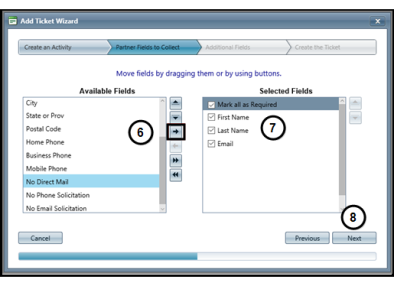
- Select a field in the Available Fields pane and then click the right arrow button to add it to the Selected Fields pane. Repeat this step to add more fields.
Note: The items in the Selected Fields pane represent the information to be collected from someone who registers for the event.
- Mark the checkbox for each field to require that the information be collected during event registration.
Tip: Mark the Mark all as Required checkbox to require that all of the information in the Selected Fields pane be collected from a registrant.
- Click Next.
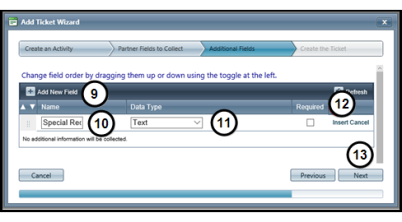
- Click Add New Field.
- Enter a name for the field.
- Select the Data Type.
Example: In the above graphic, a Special Request text field will be available for anyone who needs assistance or has specific dietary requirements. The Required checkbox is not marked because this information is not applicable to all event attendees.
- Click Insert.
- Click Next.
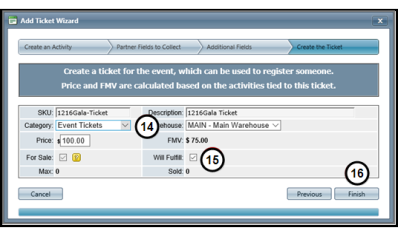
- Select Event Tickets in the Category field.
- Mark the Will Fulfill checkbox to send the ticket order to the warehouse.
- Click Finish to create the ticket for this activity.
|
Copyright ©2017 Aegis Premier Solutions |